
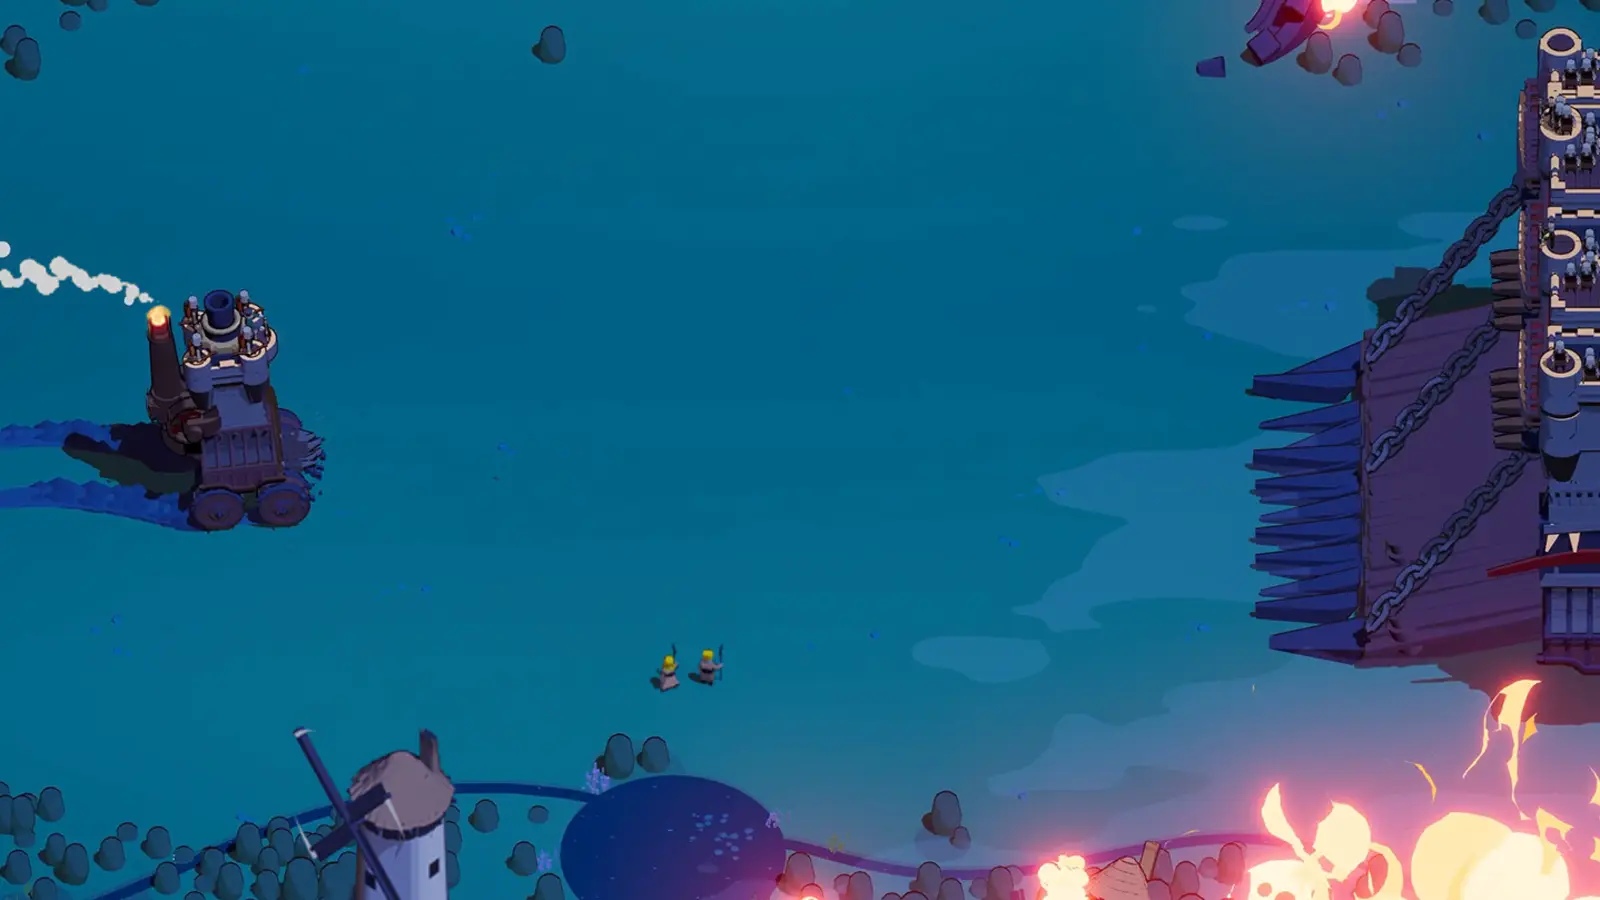
Let the army deal damage while you keep the castle safe
- Reviewed
- Scope
- Early Access; see version notes
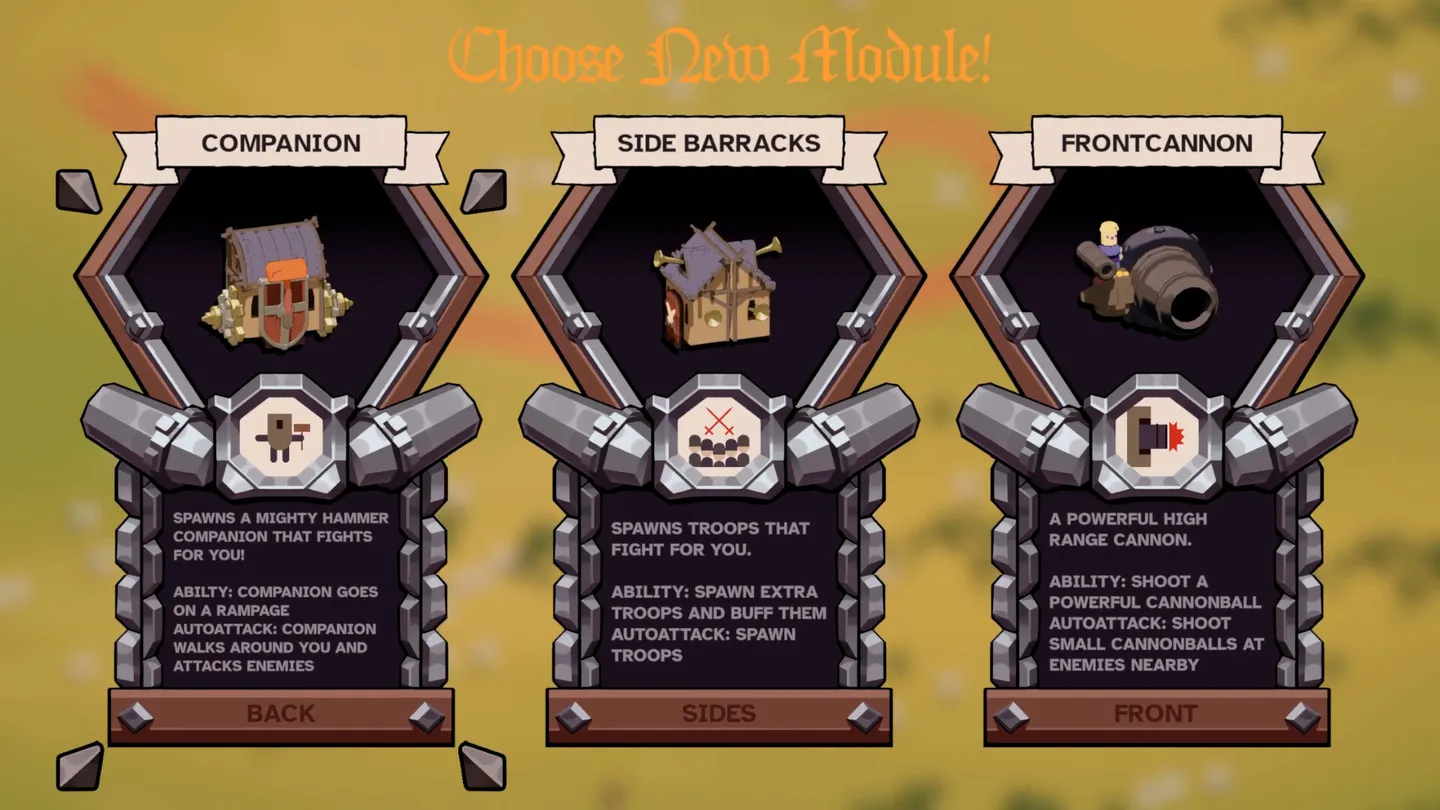
This setup uses summoned units as the main source of pressure. The recorded Empress run starts with Front Barracks, adds Side Barracks and obtains Companion for the Back slot. A Top module fills a remaining slot, but it is not what defines the build.
The opening description reports doubled friendly spawns and a movement-speed drawback. Do not turn that into a claim that every later upgrade, summon interaction or numerical bonus doubles in exactly the same way. The player explicitly questions how some incremental spawn upgrades interact.
Prepare the Empress loadout
| Choice | Recorded approach | Optional alternative |
|---|---|---|
| Captain | Empress | A different captain means a different variant |
| Starting module | Front Barracks | Side Barracks is considered before the player changes the start |
| Main additions | Side Barracks and Companion | Work with available rolls; neither appears on command |
| Crew | Merchant | Carpenters is considered for recovery, not tested as the same completed run |
| Starting artifact | Stiletto for melee damage against full-health enemies | Use a support effect you own if this is unavailable |
The module screen shown above includes Companion and Side Barracks, helping distinguish the Back and Side choices. Make sure the chassis can support the Side slot before copying the list.
Build the army before scattering upgrades
The recorded run improves barracks spawn counts, attack intervals and relevant damage while developing Companion. That is the core logic: strengthen the units already doing the work.
Extra units, faster attacks and cooldown can each help, but they solve different problems. If your army exists but targets live too long, inspect damage or attack frequency. If an important active deployment is unavailable, cooldown may matter more.
Do not prioritize an unrelated Top attack merely because it is the newest module. Keep it useful without starving the summoned-unit core.
Keep your own escape route open
An army attacking nearby does not mean the castle is safe. The player repeatedly takes cannon fire, runs low on Nitro and needs healing. Steering remains your job even when the units are dealing most of the damage.
Pick open routes before the fight becomes crowded. If you spend all Nitro on routine movement, you may have no answer when a projectile lane closes. A defense upgrade can help absorb mistakes, but cannot guarantee an exit from a trap.
Treat Companion choices individually
The footage shows options affecting attack behavior, size and additional attacks. Read the current choice instead of assuming every upgrade is merely more units. A branch can change what the Companion does, not just how many appear.
The player takes different options across summon runs. That makes them examples of viable variation rather than one mandatory progression tree.
Separate the boss clear from Overtime
The demonstrated Empress setup performs strongly against the boss sequence but ends under late ranged pressure. A recovery crew is suggested afterward as something to try, not demonstrated as a guaranteed fix.
For an Overtime attempt, ask whether you can recover health and move safely after the army has already reached good damage. The desert Overtime guide focuses on the mortar threat that makes this distinction important.
If you do not own enough summon modules, use the best build comparison for another plan. For captain trade-offs, see best starting captain.
Establish the barracks before fighting a large castle
The recorded Empress player initially considers Side Barracks, changes the starting choice to Front Barracks, and then builds toward the full summon setup. The first objective is a functioning army, not an immediate fight against the largest structure nearby. Early in the run, the player deliberately postpones attacking a castle until the summoned force has improved.
Follow that pacing when your starting army cannot remove a target quickly. Collect accessible resources, choose a relevant barracks upgrade and check the result against a manageable enemy. Standing beside a slow target exposes the castle while the build is still missing Companion and much of its supporting damage. An army that eventually becomes overwhelming may have a vulnerable opening.
Use the first important active deployment deliberately. Bring the fight into a position where your units can contribute, then watch whether the target loses health before committing to a closer pass. If the castle must turn around to bring an attack to bear, leave room for that turn. The recorded player later struggles to face a boss while under pressure, despite having many friendly units available.
Once a large target is dying reliably, collecting its reward can accelerate the next part of the setup. Keep the collection route in mind while fighting. The player gains useful artifacts and Gold through these encounters, but also repeatedly needs healing. Successful early aggression is therefore conditional on the army actually shortening the fight and the castle retaining a safe way out.
Distinguish more units from better attacks
Summon upgrades can change several things that look similar during a crowded battle. A higher spawn count puts more friendly bodies into play. A shorter attack interval improves how frequently existing units attack. An active charge or cooldown change affects when you can create a stronger moment of pressure. Read which part of the barracks is being improved before treating every option as equivalent army growth.
| Current problem | Useful direction to inspect | Why it fits |
|---|---|---|
| Too few units are present during the fight | Spawn count or relevant deployment upgrades | Establishes the army's presence |
| Units reach enemies but kills are slow | Attack interval or applicable damage | Improves the work each unit performs |
| A useful active attack is unavailable too often | Cooldown | Reduces the wait between those attacks |
| One deployment ends before a long fight is resolved | Duration, if that choice affects the deployment | Extends a useful effect rather than adding unrelated damage |
| The army fights elsewhere while you are hit | Positioning and movement | A larger unit count does not select a safer route |
The Empress run takes additional riders at one choice and attack interval at another after the army is already substantial. That is a useful example of changing priorities as the build develops. It is not necessary to keep maximizing count once units are present and the next issue is how quickly they attack.
The captain's spawn benefit should not be used to perform unsupported arithmetic on every card. The player explicitly wonders whether additional riders from later upgrades are doubled in the same way as the starting benefit. Follow the current card and observable result. The build's practical recommendation remains sound without inventing an exact total for each future summon upgrade.
Make Companion a second source of pressure
Companion enters the recorded setup through the Back slot after the barracks core is underway. The player immediately notices the additional friendly presence with Empress. Treat this as another working part of the army, not a reason to stop upgrading the units that have carried the opening. A new module needs choices that support the job you want it to perform.
The footage includes Companion options involving effect size, attack behavior, additional ranged attacks and later special effects. These choices are more specific than simply increasing a generic summon number. An effect-size option matters when a larger attack area can reach the enemies being fought. An attack-interval option matters when the Companion is already engaged but needs to attack more often.
The recorded player chooses an additional attack effect instead of a coin-collection option. That choice keeps Companion focused on combat. You can make the same distinction when offered a utility branch: decide whether the immediate problem is enemy pressure or collecting the rewards already produced. A utility effect is not automatically bad, but it should earn its place in the current run.
Later, added ranged attacks visibly broaden what the Companion contributes in the player's account of the fight. This helps explain why the build can continue damaging enemies while the castle maneuvers. It still does not establish that every Companion branch is equally strong or that this page's example is the only sequence worth taking. Choose the branch that addresses the enemies your existing barracks are leaving alive.
Select artifacts by module and damage type
The recorded starting artifact is Stiletto, chosen for extra melee damage against enemies at full health. That condition matters. It supports the beginning of an engagement; it should not be described as an unconditional multiplier applied equally throughout every boss fight. If the first hit is already easy and the long remainder of the fight is the problem, evaluate later choices against that remainder.
The run also takes damage and cooldown effects for Front, Side or Back modules. Those categories are useful because the main army occupies different slots. A Side-module improvement should be evaluated against Side Barracks, while a Back-module improvement is relevant to Companion. A Top-only bonus does not become an army-wide improvement just because the castle has an unused or weak Top attack.
Melee damage appears repeatedly in the player's selections, but avoid assuming every attack produced by every summon shares exactly the same tags. Check the current module and upgrade descriptions, especially after choosing branches that add ranged behavior. A name or visual impression is a weaker guide than the equipment's actual effect text.
The player also experiments with artifacts that strengthen a previous or subsequent artifact. These make the order of selection important, but they do not let you choose an unavailable future result. If the next reward offers movement or recovery that you urgently need, consider its immediate usefulness. Saving the entire run for an ideal amplified damage reward can leave the castle exposed before that combination appears.
Decide between Merchant and recovery before departure
Merchant is the demonstrated crew choice for this Empress run. The player considers Carpenters for ongoing healing and then chooses Merchant to support Gold income. That choice helps explain the run's emphasis on growth, but it also means the later suggestion to try healing is a proposed alternative rather than a second completed Empress test.
Choose between those roles using the kind of attempt you want. If the opening consistently fails before the army forms, improved growth may help you reach useful upgrades sooner. If the army already clears bosses and repeated small hits end the continuation, a recovery-oriented crew is a reasonable experiment. Neither role fixes being trapped in overlapping projectiles with no route out.
Do not compare the two crews only at the death screen. Notice when the run first becomes unhealthy. If health falls during the opening because you approach targets the barracks cannot yet kill, change the approach as well as the crew. If the build remains healthy until late mortars arrive, the next revision should address that specific pressure instead of weakening a successful opening without a reason.
The same distinction applies to defense artifacts. Extra maximum health gives more room for damage, an accessible heal restores lost health, and ongoing recovery needs time to contribute. A one-time survival effect may buy another chance but cannot support repeated mistakes indefinitely. Pick the effect whose timing matches your current problem.
Drive around the army rather than through the danger
The hardest part of a developed summon build can be keeping track of the castle while friendly units occupy much of the screen. Direct your attention to the next patch of ground you can reach, the incoming projectile lanes and your available movement. The army continues its work; your steering still determines whether the castle survives the next few seconds.
In the Empress footage, several dangerous moments occur after Nitro has been spent casually. The player later acknowledges holding boost too freely. Use ordinary movement when the route is already safe, then keep Nitro available for a closing lane or a badly timed turn. The captain's movement drawback makes that reserve especially relevant to the way this setup plays.
Keep collection passes short when ranged enemies surround the area. A health pickup is valuable only if you can reach it without losing more health on the approach. The run repeatedly returns to healing while the army continues fighting. That is a useful division of work: units apply pressure, while the castle chooses a route that restores its margin for the next encounter.
If the army is attacking something off to one side, do not automatically follow it into the same space. Check whether the target is important and whether the route remains open. Friendly units dealing damage elsewhere can be useful; copying their location with the larger castle can create a collision or a turn you cannot complete.
Read the boss health bar before spending another deployment
A screen full of summons can hide whether the intended boss is actually taking damage. Watch the boss bar during a useful active attack. If it drops quickly, maintain the angle and preserve the exit rather than chasing a secondary reward. If it barely moves, inspect where the units are fighting before concluding that the build needs another general damage bonus.
Other summon footage shows troops occupied by nearby smaller enemies around a late tower. That is a general targeting problem to recognize, not proof that every army has a command button that redirects all units instantly. Clear immediate pressure when necessary and create a better approach. Avoid parking inside the surrounding group to wait for automatic targeting to change.
When an active ability is unavailable, steer toward the next useful pass instead of spending the entire recharge beside the boss. Your units may still contribute during that interval. The purpose of retreating is to preserve the castle long enough to deliver the next effective attack, not to abandon the boss until escalating pressure makes it harder to reach.
Carry the useful parts into Overtime
The recorded Empress run clears its boss sequence convincingly and then ends under mortar pressure in Overtime. Preserve both parts of that result when adapting the build. The army is a demonstrated way to handle the normal sequence, while late ranged survival remains the problem the example does not solve.
Before continuing, check whether you still have a reachable source of healing, a movement reserve and enough visibility to choose a route. More riders may improve an already strong army without changing the fact that projectiles are reaching the castle. Once that happens, movement, protection or recovery should compete seriously with another offensive choice.
Hotfix 0.9.9 fixed diminishing-damage upgrades for Front Barracks, strengthened its active ability and made allied melee units move faster toward targets. Those changes are relevant when comparing older summon footage, but they do not promise immunity to ranged attacks. Keep the current card values and the actual fight in front of you as the basis for each choice.
If you return to the build after a loss, keep its purpose precise: establish the barracks, add Companion, improve the units that are doing useful work, and spend the resulting freedom on safe driving. A larger army is successful when it lets the castle survive and complete its objective, not merely when it fills the screen.